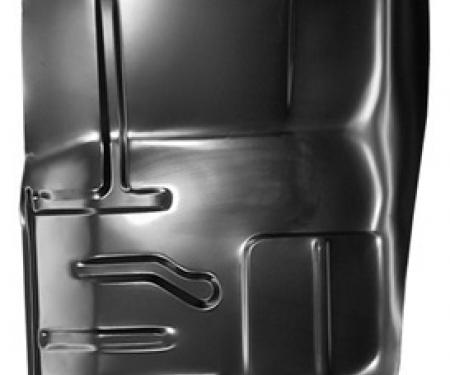
Direct replacement right front cab floor section for 1960–1966 Chevy trucks (panel requires minor modification for 1965–1966 models). This heavy-gauge steel floor patch restores structural integrity where original metal has corroded or been damaged, matching factory contours for a clean fit and reliable repair. Designed for ease of fitting and welding, the panel helps secure the cab, reduce vibration, and provide a long-lasting foundation for interior restoration or daily use vehicles. Durable construction and corrosion-resistant coating simplify finishing and extend service life.
Features:
- Fits 1960–1966 Chevrolet trucks; panel modified for 1965–1966 model year fitment.
- Stamped from heavy-gauge steel to match factory floor contours for a precise repair.
- Restores structural integrity and support for seats, pedals, and interior flooring.
- Pre-formed design reduces fabrication time; intended for welding into existing cab structure.
- Durable finish helps resist corrosion and simplifies priming, sealing, and painting during restoration.
- Ideal for restoration projects or replacement of rusted/damaged factory floor sections.
Installation / Application:
- Difficulty: 4/5
- Estimated time: 4-8 hours (typical, depending on rust extent and experience)
Instructions:
- Prepare vehicle: disconnect battery, remove seats, carpet, console, and trim to expose the damaged floor area.
- Inspect and mark: assess corrosion extent, mark cut lines along solid factory seams and where the old floor must be removed.
- Cut out old metal: use an angle grinder and spot-weld cutter to remove rusted sections, preserving as much factory flange and structure as possible.
- Test-fit new panel: position the right front cab floor section and verify alignment. Trim or bend panel as needed for 1965–1966 modification areas to match surrounding structure.
- Clamp and tack-weld: secure the replacement panel with clamps and apply tack welds around the perimeter. Re-check fit and gaps before final welding.
- Weld fully: stitch or plug weld at factory seam locations to minimize warping. Allow cooling intervals to prevent distortion and maintain panel alignment.
- Grind and finish welds: blend welds smooth with a grinder, clean welded areas with a wire brush, and remove any debris or splatter.
- Protect and seal: apply weld-through primer to welds, seam sealer to joints, and corrosion-resistant primer/paint to the repaired area.
- Reassemble interior: reinstall insulation, carpet, trim, seats, and any removed components. Reconnect the battery and check for proper fit and function.
- Final inspection: verify floor is secure, free of gaps or leaks, and finished to match surrounding interior surfaces. Address any alignment or sealing issues as needed.
Vehicle Fitment:
The Vehicle Fitment Guide is to be used as a general reference. The data has been provided by our suppliers and manufacturers and may contain errors or incorrect data. Always refer to a professional to verify correct fitment for your vehicle.
| Make |
Model |
Years |
| Chevrolet |
C10 Panel |
1960 - 1966 |
| Chevrolet |
C10 Pickup |
1960 - 1966 |
| Chevrolet |
C20 Pickup |
1960 - 1966 |
| Chevrolet |
C30 Panel |
1960 - 1966 |
| Chevrolet |
C30 Pickup |
1960 - 1966 |
| Chevrolet |
C40 |
1960 - 1962 |
| Chevrolet |
Corvair Truck |
1961 - 1964 |
| Chevrolet |
K10 Pickup |
1960 - 1966 |
| Chevrolet |
K20 Pickup |
1960 - 1966 |
| Chevrolet |
P10 Series |
1960 - 1966 |
| Chevrolet |
P20 Series |
1960 - 1966 |
| Chevrolet |
P30 Series |
1960 - 1966 |
| Chevrolet |
Sedan Delivery |
1960 |
| Chevrolet |
Suburban |
1960 - 1966 |
| Chevrolet |
Truck |
1960 |